Website Containerization with Docker Project
Successfully containerized a responsive static website using Docker. Learned
and implemented Docker fundamentals. Configured Nginx web server within
the container. Goal of this project was to learn more about docker and
containerization.
In this project documentation, I’ll be showing you how I sucessfully created a docker image that contains a static website running on Nginx. Once my docker image is ready, I’ll upload in to Dockerhub.
Prerequisites:
- A static website saved locally
- Docker
- An account at Dockerhub
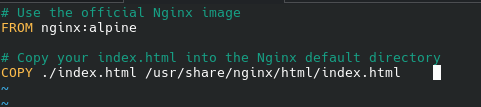
Step 1: Create a Dockerfile inside of website’s root folder.
A Dockerfile is a plain text-document that conatins a set instructions that tells Docker how to corretly build the docker image.
Navigate into your website’s root folder and create a file called “Dockerfile”.
Here’s how my Dockerfile looks like:
Step 2: Build the Dockerfile and run the Docker image
To build the Dockerfile, enter this command:
sudo docker build -t my-nginx-website .
To run the docker image, enter this command:
sudo docker run -d -p 8080:80 --name my-nginx-container my-nginx-website
In order to check if your docker containter is sucessfully running, list all available containers by entering:
docker ps
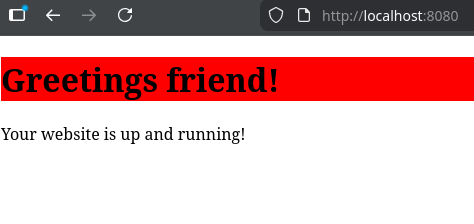
Now lets check if the website is reachable from the web-browser by entering this in the URL-bar:
http://localhost:8080
In case you would like to stop the container, enther this command:
sudo docker stop my-nginx-container
In case you would like to start the container again, enter this command:
sudo docker start my-nginx-container
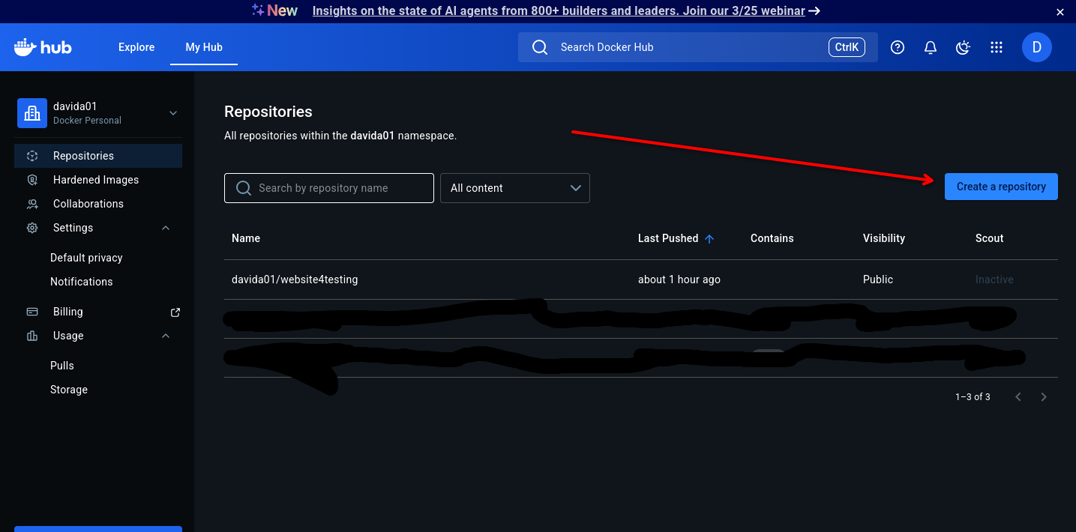
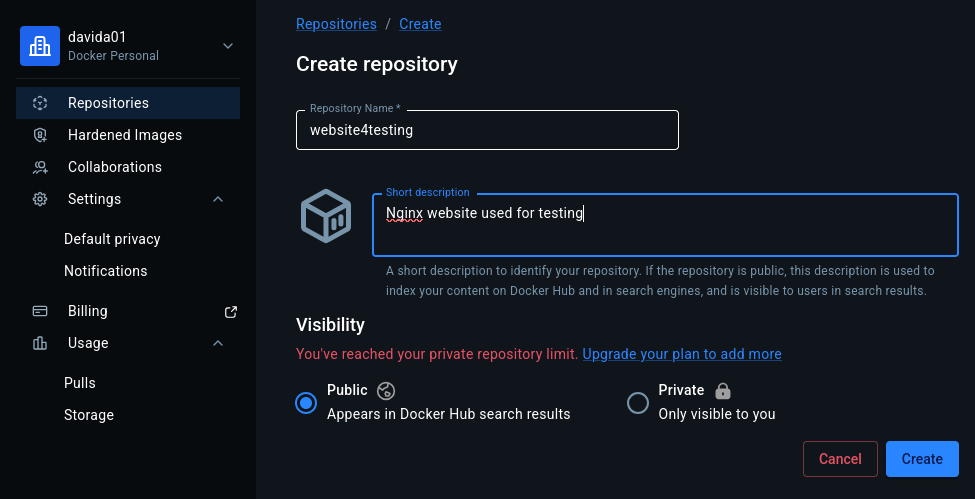
Step 3: Create a repository at Dockerhub
Headover to https://hub.docker.com/, make sure your logged in and create a repository.
Step 4: Authenticate to Dockerhub via the terminal
The first step we have to complete in order to be able to upload the Docker image to Dockerhub is to login to Dockerhub via terminal. To login to Dockerhub via the terminal, enter this command:
sudo docker login -u your-dockerhub-username

Step 5: Tag the Docker image
A tag can be described as a pointer that will tell Docker your local Docker image belongs to a Dockerhub online repository. To tag a Docker image, enter this command:
sudo docker tag my-nginx-website your-dockerhub-username/your-repository:latest

Step 6: Push the Docker image to Dockerhub
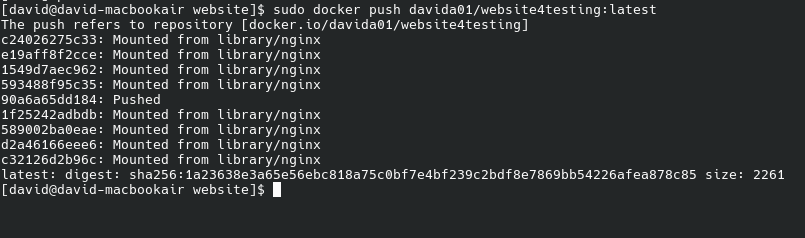
Once the Docker image has been sucessfully tagged it’s time to push it to the Dockerhub repository. In order to push the Docker image to the Dockerhub repository, enter this command:
sudo docker push your-dockerhub-username/your-repository:latest
Summary
We have now sucessfully created a Docker image containing a website and uploaded it to Dockerhub. At this point, anyone in the world can run the site with a single command.
In this project walthrough we have:
- Created our own dockerfile and docker image containing a static website
- Uploaded the docker image to our own Dockerhub repository
- Successfully ran our docker container locally